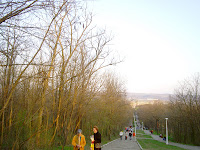
These days I had no mood for exploring internet but caught the PS flue. Maybe you know it - you find an interesting tutorial, then get to read the others on that site, remember some old photos that should get your attention regarding the new possibilities you have. Before you know, a few days passed in a very pleasant editing mist and everything else is crying for you and I mean your house especially.
Ok I'm exaggerating but not much. So I was rediscovering America . Or maybe not. Got this photo
- a brave little digital camera, not much of a light, no optical zoom; who could ask for more? Well, you always can ask for more - if you have the proper tone. Now seriously read more
as long as the photo isn't burnt white and has some information in it you can get if not all the detail then the moment's mood. That's what I learned in years of using a brave little digital camera (no optical zoom).
as long as the photo isn't burnt white and has some information in it you can get if not all the detail then the moment's mood. That's what I learned in years of using a brave little digital camera (no optical zoom).
 I was saying...oh yes: begin with some Levels adjustments (Ctrl - L) and move the gray and white sliders to the left; play around until you're pleased. So you're not pleased...the lovely blue sky is bleached.
Next step. Next step should be using Hystory Brush tool (Y) to paint over the sky and restore the blue color. As you can see there are some thin branches involved; if we paint over they will blackened. I was sure you don't want that. So we chose to select them with Select - Color range; again play with the slider a little. Invert the selection (Select - Inverse; Shift Ctrl I) and paint over the sky and the branches - remember, History Brush tool and enjoy the view of the blue sky reappearing. There you have it.

 Nice colors huh? A bit flat... Use further the twisted version of this Mock-up effect tutorial. (Btw this is where I dived last day; just to see who is guilty for all the mess). Get in Quick Mask mode (Q) or press the right button of those two marked in the image.
Paint with a large soft brush over the part you want to be selected.
Press Q again or the left button and you have your selection. The rest of the work is similar to the tutorial : Filter - Lens Blur with settings: Shape Octagon; Radius = 11; Brightness = 45; Treshold = 255. Next Filter - Distort - Lens Correction - Vignette to darken the margins of the photo (Amount around -45 - -75 depending on how darken you want it to be).
If you think the effect is too strong you should lower layer Opacity. You knew that did you? Ok if , like me, you forgot to duplicate the layer before you begin to work? So duplicate it now(see photo) and chose new document; give it a name (2), hit ok. Return to the photo you worked on (1) and Alt Ctr Z to get back in time. Move the 2 on a new layer in 1 and work on the opacity until the DOF is subtle enough. Was better if you were hitting Ctr J in the begining I assure you. Here's your Fake DOF. I like it better this way - do you?


No comments:
Post a Comment